
Detail on Design: Tip #1 How to Create a Strong Focal Point on Your Scrapbook Layouts

Hey friends!
Let’s talk about something that can truly transform your scrapbook pages: creating a strong focal point.
If you’ve ever looked at a finished layout and thought, “It just feels a little busy,” or “I’m not sure where to look first,” then today’s post is for you.
The good news? With just a few thoughtful choices, you can bring focus, clarity, and a whole lot of joy to your pages. Let’s dive into this beautiful design principle together.
What is a Focal Point?
Your focal point is the place your eye naturally lands first — usually your main photo or a meaningful title. It’s the heart of your layout — the part that holds the most emotion or tells the biggest piece of the story.
When your layout has a strong focal point, everything else on the page supports and enhances it, rather than competes with it.

5 Ways to Make Your Focal Point Shine
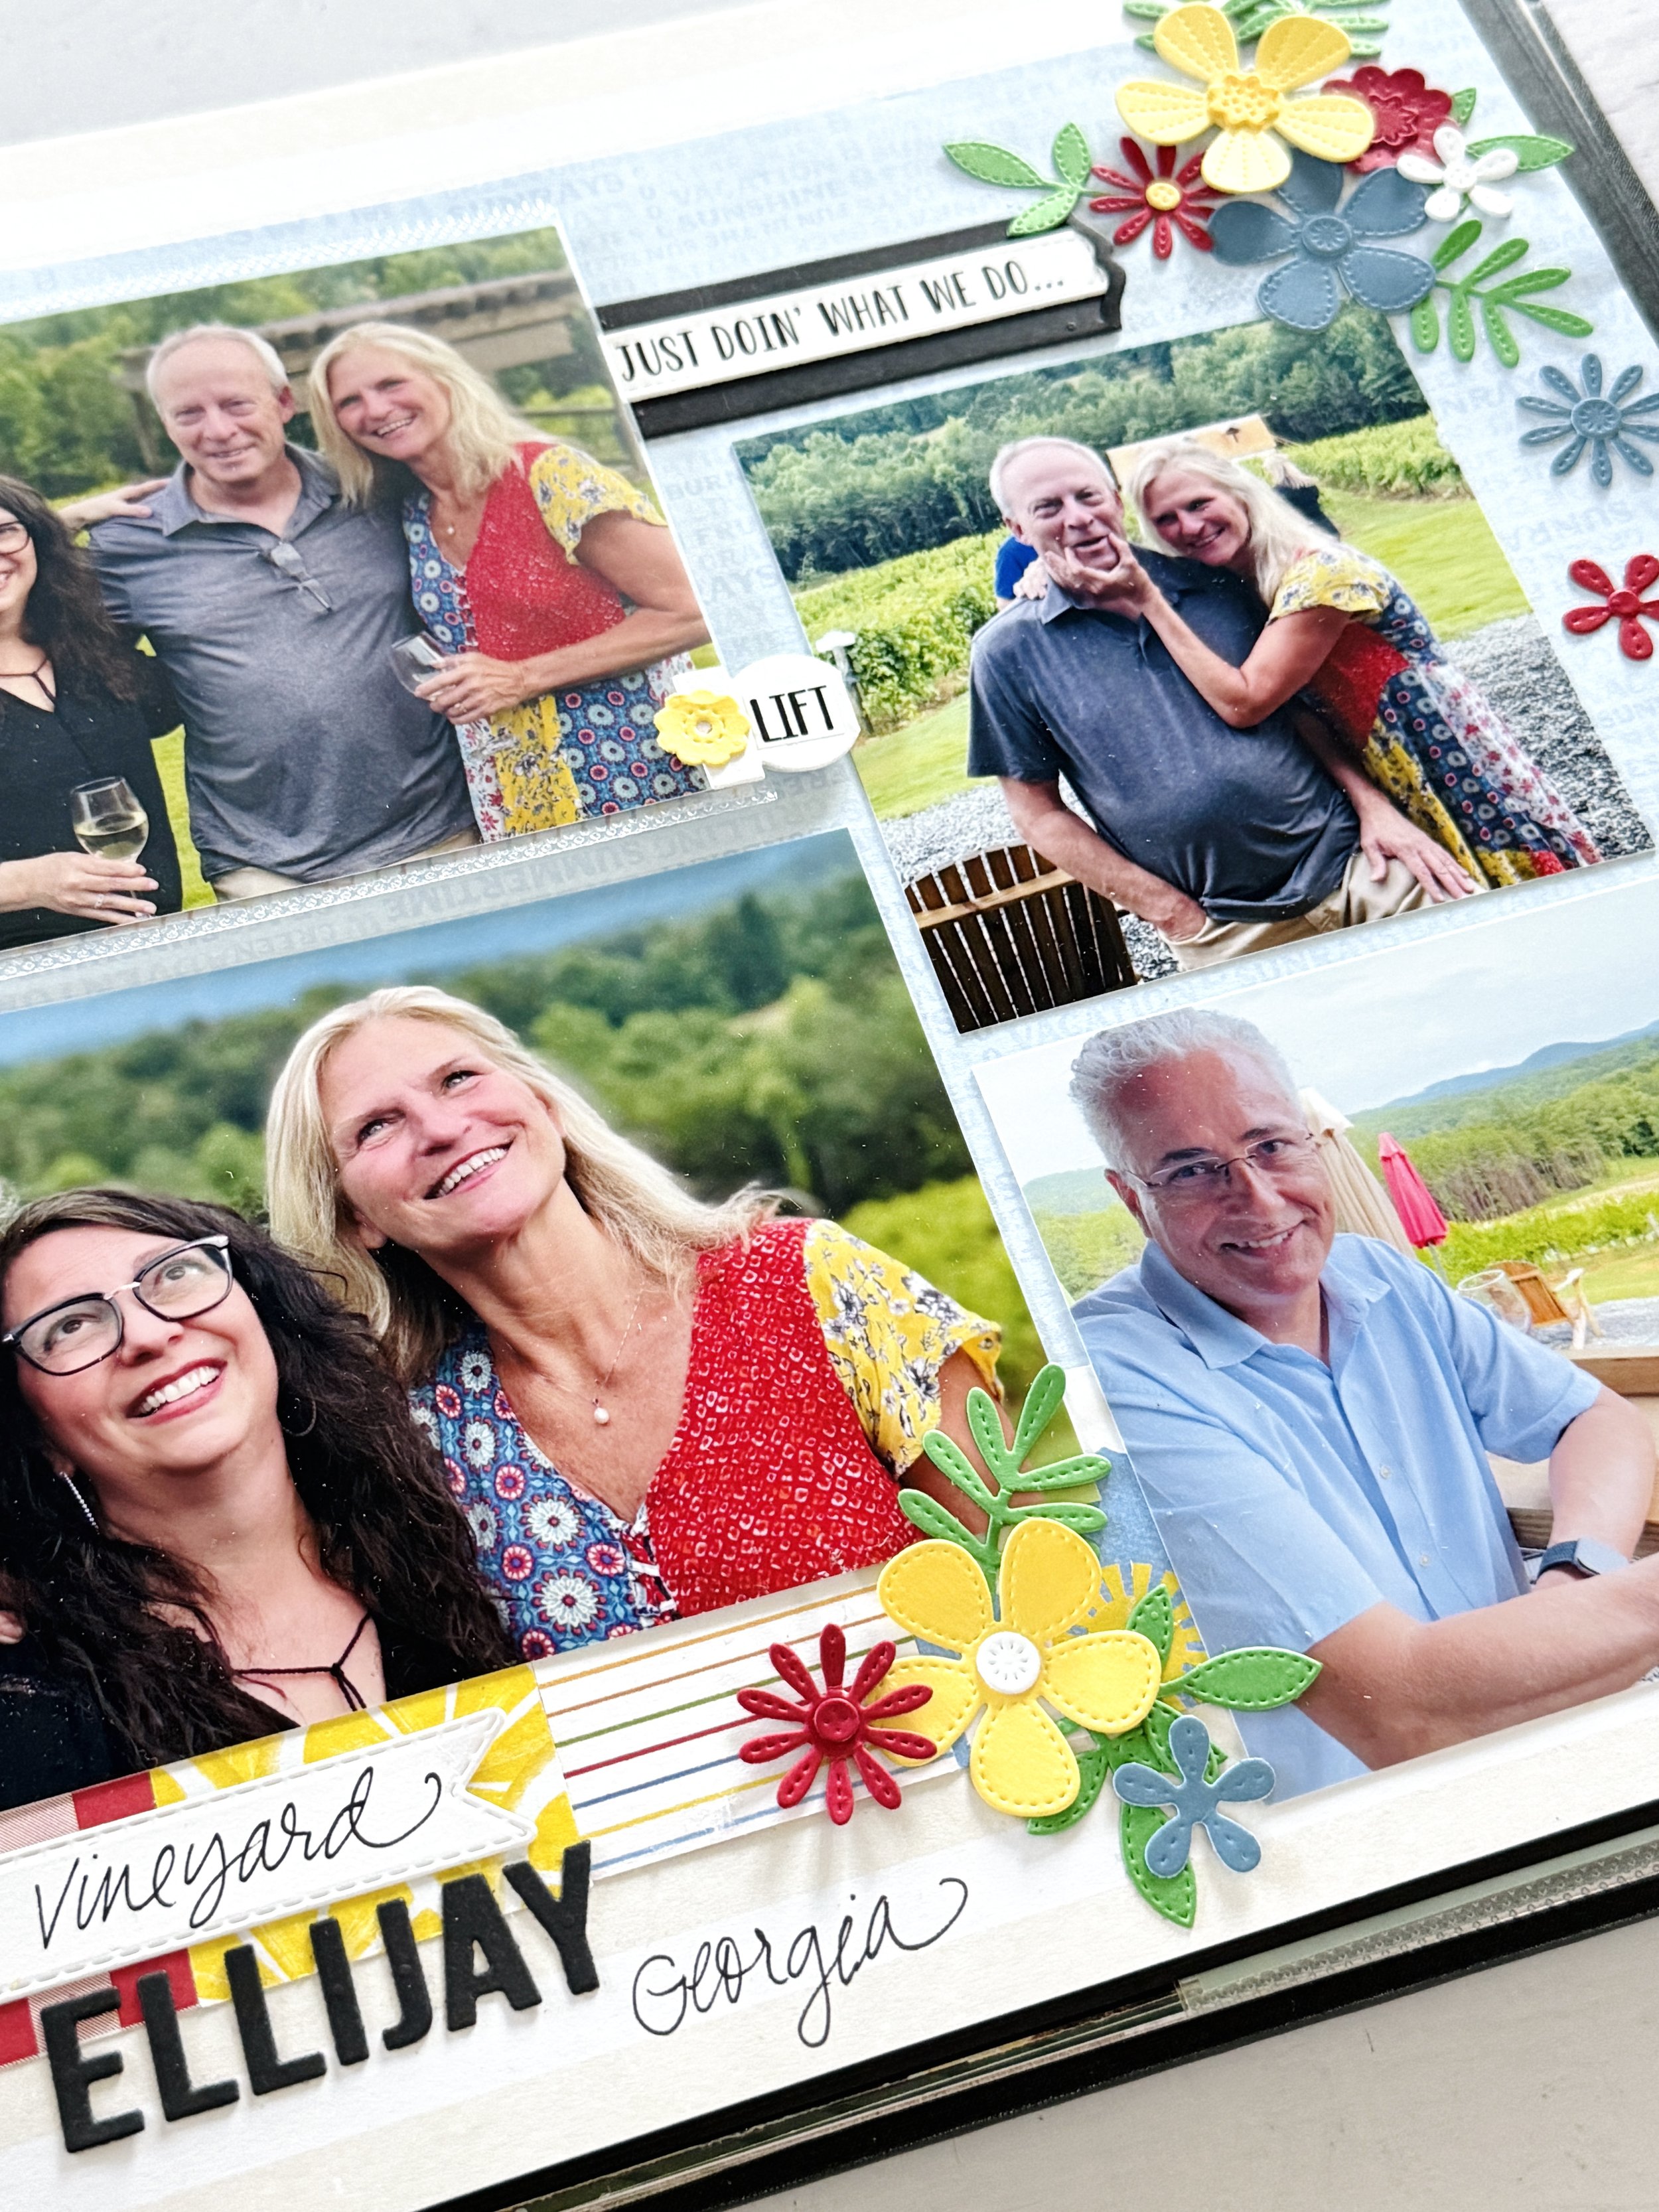
If you watched my video already on this, you may be thinking, I don’t remember those pages! Well, have you ever had just one of those days? Things did not click for me while I was live, so I spent some time thinking about my layout. Doing this reinforced just how important making changes can be when working on your pages. I moved things around, gave more focus to my favorite photo with a title, set it off by itself, and then created my own embellishments. All of a sudden, things began to click! I realized I was forcing myself to use the products from the collection I was using, when what I wanted was layers of color and texture. The flower die cuts and “life is good” title gave me just what I needed. Lesson learned: take a minute to pause and think about what your layout really needs. You never HAVE to use something just because it it part of the same collection.
And if you like the way my page turned out, you can recreate it with the exclusives from my shop, and the Sunrays for Days Paper Pack from Creative Memories. If you do not have one already, the square punch is a must-have for any crafter. This standalone punch creates a cutout of a square and is perfect for all sorts of themed layouts and crafts, from birthdays and vacations to everyday moments at home. It cuts a perfect 1-3/4” square every time and I find it so handy to have.
So lets get back to our design tip, and I want to share with you a few of my favorite ways to help your focal photo or element really shine on the page.
1. Start with Contrast
Use a mat that pops — maybe a dark navy behind a light photo, or a bright white against a colorful background. That contrast helps the eye stop and see.
2. Go Big with Scale
Don’t be afraid to make that one photo larger than the rest. It’s OK to let it take center stage. It’s your story — highlight what matters most.
3. Frame It with Layers
Layering paper, vellum, or embellishments around your photo gently tells the viewer: “Hey, look here!” It's like giving your photo a little hug.
4. Add a Cluster or Two
Tuck in a few embellishments — maybe a sticker with a sweet word, a die cut, or a little journaling tab you make with the tab punch from Creative Memories— just enough to add some charm without stealing the show.
5. Let It Breathe
Don’t feel the need to fill every inch of space. White space (or “resting space”) allows your focal point to shine. It’s a gift to the eye — a quiet moment of focus.
What to Watch Out For
Let’s be real — we’ve all had pages that ended up feeling a little too full or chaotic. If everything is bold and layered, the eye doesn’t know where to land.
Here’s what to keep in mind:
Too many big, bold elements can compete with each other.
Avoid placing your focal photo too close to the edge — it can feel “off balance.”
Check in with your eye — does it know where to go first?
Take a breath, simplify, and let your photo lead the way.
📸 Try This Layout Flow
Want to practice creating a focal point? Here’s a simple layout recipe:
Choose one special photo
Mat it with contrast
Place it slightly off-center (the “rule of thirds” works beautifully here!)
Add one or two clusters nearby
Leave space around it — don’t overcrowd
Step back and see how your eye is drawn in. It’s a magical feeling.
💌 Grab Your Free Printable!
Because I love giving you tools that bring more joy to your craft time, I made a little something for you — a free Focal Point Checklist you can print and keep at your desk. It’s a sweet reminder of the tips we just talked about.
💬 Let’s Chat!
I’d love to know — what’s your favorite way to highlight a photo or create a focal point? Drop a comment below or come hang out with me over on Instagram!
You’ve got this. Your pages are already beautiful — this tip just adds a little sparkle of intention.
Want to check out the video to see these tips in action? Just click HERE or on the photo below.

Happy creating my friends!

Need supplies to try out this design tip on your pages?
I would LOVE to be your Creative Memories Advisor, and be the scrapbook store near you - in fact right in your living room! Remember if you shop with me on the Creative Memories Website, you can be part of my rewards program and earn 5% back on your qualifying purchases, or earn FREE gifts when you shop my in-stock inventory on my personal website.